In the previous article dedicated to teaching pre-school children I presented some ideas on how to teach Young Learners to work in pairs and groups. This time I am going to dive into the children’s world of imagination. This series was first published in the Teacher Magazine in 2013/14.
Pupils love the concept of magic: casting spells and turning objects into other objects. As I already tried to demonstrate in episode 5 of our series, when we do what students expect or wish for, we are much more likely to end up with motivating and effective lessons. Remembering that, we could use the concept of magic to make our lessons more attractive and thus more appealing to students. However, I also strongly believe that this kind of creative play should be a means to a linguistic end. Thus I am going to present some simple ideas for how to sneak some magic into the classroom but accompany it by challenging language input.
MAGIC WORDS
We can easily teach children a set of extra vocabulary or phrases not necessarily linked to the course content when we put the words into a special ‘packaging’. The idea is to prepare a collection of words/phrases (about one per lesson) and call them ‘magic words,’ ‘ secret words’ or ‘passwords.’
At the end of each lesson tell your students what the secret word is today. You can make up a simple rhyme to introduce the words, or you can use this rhyme:
The Secret Word: is it a bird?
The Secret Word: is it a tree?
I don’t know – you tell me!
The Secret Word is…
Announce that only if students know the ‘secret word’ they are allowed to enter the classroom next time. This is highly motivating! I know from my experience that students try really hard not to forget the secret words. Even parents are involved and remind their kids about the ‘secret’ before the lesson. Of course if a child does not remember the word the teacher should help, so that the magic raises interest but causes no stress.
It is a good idea to draw the secret words on separate pieces of cardboard paper and keep them in a box. Then you can revise the vocabulary during the lessons and even use it to play some flashcard games.
A FLYING CARPET
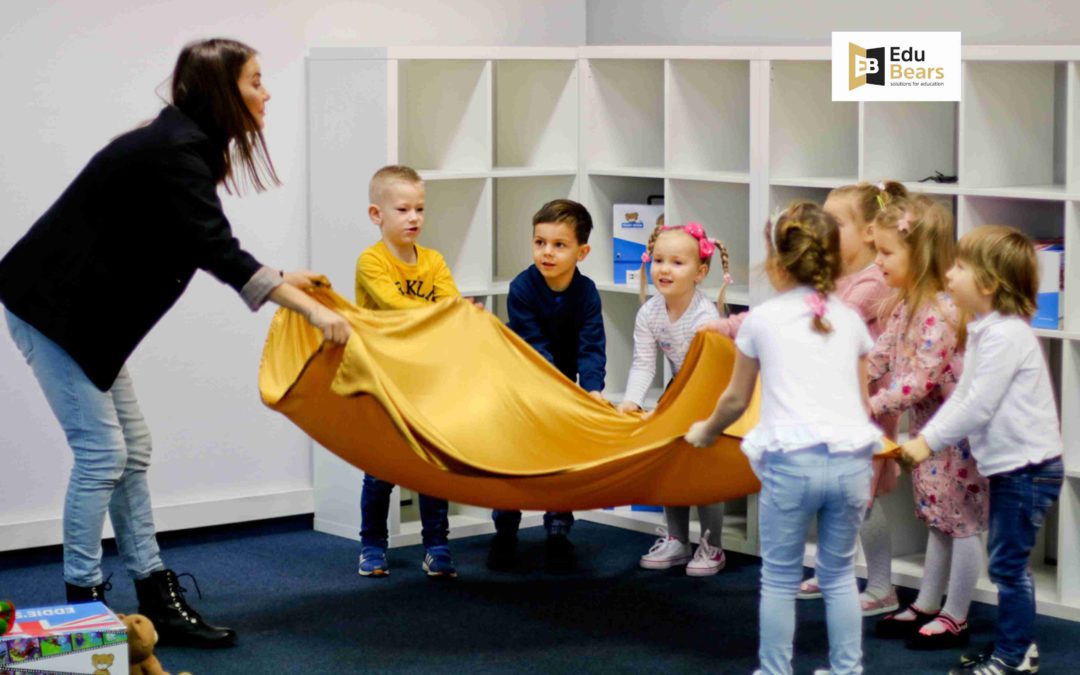
It is also a good idea to localize English for young learners and link it to a specific activity. How about a magical place where only English is used? Prepare a piece of cloth – 1,5-2 m2 should be enough (a big blanket will also do). Tell students that this is a flying carpet. It is a magical object which flies when students speak English. English is like fuel which makes the carpet go (remind your students about that fact during the exercise). In my experience children accept the concept very quickly and avoid using L1 while sitting on the carpet.
You always start the activity with the same routine:
Take the cloth out, spread it on the floor, and say the rhyme:
1,2,3, flying carpet come to me
3,2,1 sit down
Invite your class mascot to sit on the flying carpet with you and take part in this activity:
- the mascot can ask or/and answer questions in a funny voice
- his humorous answers will add fun to this exercise e.g. Mascot, do you like cheese? Oh, yes I do, I like purple cheese! Mascot, can you jump? Yes, I can, look! (and the mascot falls down)
- throw the mascot to a student who is supposed to answer next. Establish a rule: only the person holding the mascot can speak. This helps students to focus and quiets down those who are not supposed to speak.
‘MAGIC’ DRILLS
Not only the way of introducing the words and phrases is important but also their revising. The drilling of new phrases is crucial in the Young Learners classroom. Especially interactive drills that use target language to ask questions with predictable answers. They are valuable, but are they not tiresome and boring? Not in a ‘magical wrapping’! When you practise drills on the flying carpet or use a ‘talking mascot’ or a magic wand, they gain a new angle.
The teacher asks questions to individual students and scaffolds answers if needed. Sometimes The teacher needs to model the answer and students just repeat it.
- As it is more of a drill exercise, you should demand fairly correct sentences, but you cannot bore students, so do not push too much.
- At the beginning accept answers Yes/No, later scaffold short answers like Yes, I do./No, I don’t.
- You should ask only a few questions at a time – the activity should be no longer than 5-6 minutes. It should be revised frequently though.
- If you have a more advanced group, you can add the “ASK HIM/HER” part. Students ask exactly the same question you did before, and you (or a student) point at another student to answer.
- There is a framework below where you will find four versions of interactive drills. You choose which one to practise – it depends on the age and level of your students.
- The dialogues below are perfect examples of practising the interactive drills. Do not get discouraged when it takes time for your students to master them.
T: Have you got a doll?
S1: Yes, I have. / No, I haven’t
T: Have you got a teddy bear?
S2: Yes, I have. / No, I haven’t.
T: Have you got a doll?
S1: Yes, I have. / No, I haven’t.
T: Ask him (T points at S/throws a mascot to S)
S1: Have you got a doll?
S2: Yes, I have. / No, I haven’t.
T: Ask him (T points at another S/throws mascot to another S)
S2: Have you got a doll?
S3: Yes, I have. / No, I haven’t. Etc.
T: Have you got a robot?
S1: Yes, I have. / No, I haven’t.
T: Ask him (T points at S/throws a mascot to S)
S1: Have you got a robot?
S2: Yes, I have. / No, I haven’t.
T: Can you swim?
S3: Yes, I can./No, I can’t.
T: Ask him ‘run’(T points at S/throws a mascot to S)
S3: Can you run?
S4: Yes, I can. / No, I can’t. etc.
ABRACADABRA! NO POLISH IN THE CLASSROOM!
Young Learners tend to be very talkative and usually they do not try hard to use L2 but turn to L1 as it is easy and natural for them. Our role is thus to motivate students to try to communicate using L2 and restrain from L1. There are some simple, play-like ways to do that:
- MAGIC KEYS: tell students they have magic keys that lock their mouths for L1 at the beginning of the lesson. The key is imaginary and you should pretend to turn the key in front of your mouth and hide it somewhere or throw it away.
- MAGIC BEADS: give students magic beads (something edible, small and soft, e.g. Rice Krispies or cheerios) that have this power – once they eat the beads they can speak only English.
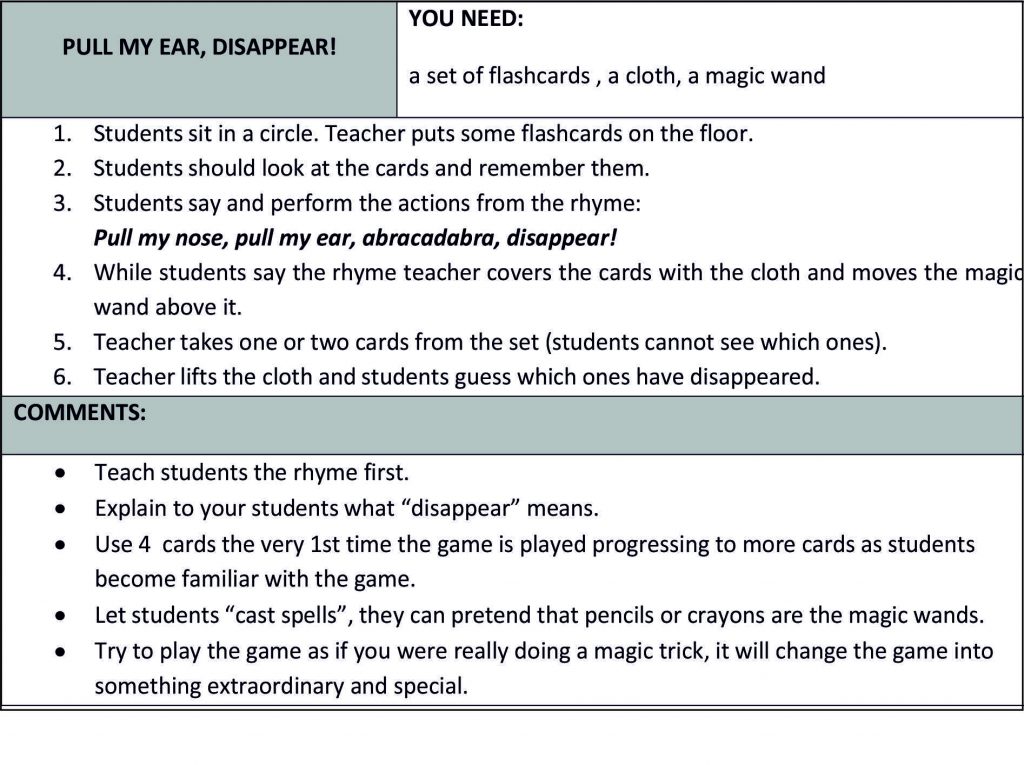
A MAGICAL GAME:
Based on my own many years’ experience as a teacher of pre-schoolers, I can guarantee that the four ideas presented in the article: the magic words, the flying carpet, the magical ways to restrain from Polish and a magic-making game will contribute to the effectiveness of your lessons and motivate (very) young learners thanks to their magical packaging. Abracadabra and… good luck!
CLICK FOR THE NEXT EPISODE OF THIS SERIES.
If you like this article, let us know! Comment, like or share! Thank you!


